

S54 Vanos Installation Notes
Begin by using the cam alignment tool to set the cams at exactly TDC assembly position. The tool bridge should rest perfectly flat on the cylinder head and the pin should fit into each cam without binding. Note that it's not recommended or intended to use 2 pins at the same time to 'lock' the cams. The tool is only for locating each cam at TDC one at a time then removed before installing the vanos. Using 2 pins at the same time can bind the tool and bend the pins.
Note that this procedure MUST be done with the piston caps installed on the front of the vanos, fully tightened down. If you have removed the caps at some point previously, then reinstall them now. If not, then this doesn't apply to you.
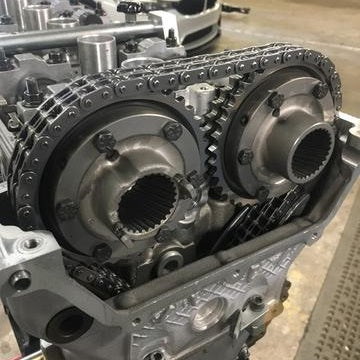
Attach the splined gears to the vanos as shown, making sure they are both pushed fully inward towards the vanos during the entire procedure. Note that the gear with the longer spindle goes on the exhaust side (oil pump side). Don't forget to install the oil pressure valve before proceeding.

Assemble the hubs on cams, leaving all bolts just loose enough to allow the hubs to rotate left and right freely. Turn both hubs all the way clockwise until they stop. Install the vanos gasket (not shown here) on the dowels and add a small amount of gasket sealer just around the dowels to hold the gasket in place during the install. Do NOT put gasket sealer all over the vanos gasket!
Position vanos as shown. It may help to use 2 longer bolts to hold the vanos up while you get the splined gears lined up. Slip the straight portion of the splined gears into the hubs one at at time. You may need to turn the splined gears by hand a little until they drop in. Don't turn the hubs, just the gears.

Continue to gently push the vanos towards the hubs until the helical portion of the splined gears is resting against the hub. Rotate the hub counter-clockwise just enough to catch the helical splines on the gear. You should only need to rotate the hub 2-3 degrees, or not more than a couple mm before the splines drop into the hub. Do this for each hub and only push the vanos in just far enough for the splines to engage the hub. You should still be able to see ~5-6mm of the helical splines, and the tabs on the exhaust hub should almost be touching the back of the oil pump disc. Note the gap between the vanos ears and the cylinder head is ~10mm.
Turn the oil pump disc with your finger until the smaller diameter holes line up with the tabs (assuming you have a drilled oil pump disc).

Now tighten 2 of the 10mm hex bolts down on each hub (opposite of each other) then back off 1/4 turn. This will temporarily 'lock' the splined gear to the hub and prevent it from moving further in or back out.

Now you can tighten the vanos down all the way to the cylinder head using the stock bolts through the ears of the vanos. Tighten the bolts evenly.
You will see the splined gears being pushed to their final depth in the hubs. Important! You should still see ~1mm of the helical gear protruding from the hubs, and each gear should still be pushed fully towards the vanos body. If either splined gear has extended further into the hub the timing will be off.

Once the vanos is fully tightened down against the head, tighten the 10mm hex bolts on the hubs to the recommended torque. You'll only be able to tighten the 3 bolts on the top half of each hub. Then rotate the crank by hand (clockwise) until the remaining 3 hub bolts are accessible and tighten those down. 
Now rotate the crank again (clockwise) until you are back at TDC, insert the crank pin and check the cam alignment with the cam tool. The bridge of the tool should rest perfectly flat on the cylinder head. If both cams are perfectly aligned, then you have successfully set up the cam timing! If not, you will need reverse the procedure until you have the all the hub bolts loose, then adjust that cam and try again. It may take a couple of tries to get it right.
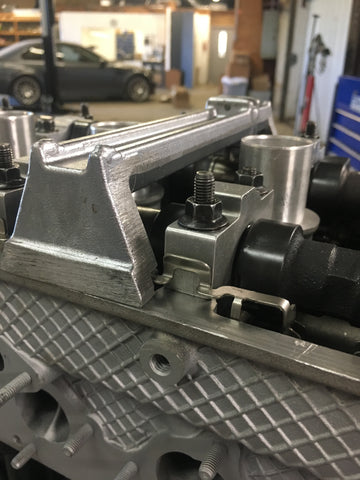
Finish by installing the 3 remaining vanos attachment bolts, the top vanos brace and the upper chain guide.
